Last April 2, my daughter and I joined in the Basic POLYMER CLAY ART Workshop by The Crafters Marketplace. We attended the class along with 7 fellow mombloggers and their kids.
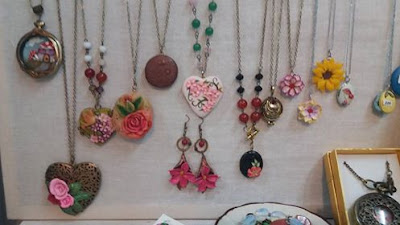 The Crafters Marketplace store showcases a wide variety of handmade items. Most of the stylish jewelry pieces and dainty accessories were made with polymer clay.
Melody, our instructor, told us crafting intricate designs in various shapes and forms imaginable is possible with polymer clay art. She used to make accessories from beads and she had switched then to polymer clay art beads and jewelry creations to take her craft one notch higher.

Most of the jewelry pieces on display were made by her and her mom. There were Clay Bangles, Clay Bead Necklace, Clay Bracelets, Clay Pendants/Lockets, DIY Clay Earrings and decorative frames with intricate polymer clay flower designs. Polymer clay art equates to infinite projects and infinite material combinations! Best of all, they can all be made using your hands, with your oven, and everyday kitchen or craft items.
For someone just beginning to work with Polymer Clay, kneading to make it elastic was hard. Each brand has different consistency. Some are much harder to work with. It takes a lot longer to knead the clay. Others are soft and sticky. The softer it is, the easier it is to knead. Some polymer brands makes it easier to get it into the shape you want. SCULPEY is much softer and faster to work with. A useful starter tool set includes a ceramic floor tile (or smooth acrylic board that the clay won’t stick to), an acryllic roller, a clay cutter and cookie cutters.
We were taught how to make flowers to start out. This is the part that I thought it was easy to do. All we had to do was make a shape of petals, arrange the petal on a flat disc to form a flower. We used a translucent liquid polymer as an adhesive. The same maybe used to soften hard polymer clay and to add colour to clay we were told.

Our next craft project was a keychain. We started kneading another batch of clay and rolled it out into a flat piece. I made mine thin, and used round and heart-shaped cookie cutters make an impression. I made some clay conversation hearts by stamping letters on the cut outs.

IMy daughter played around with letter stamps and some clay to get a good impression, without pushing too hard and getting a second circle impression around the letters. In so doing, she was able to test out how the stamp ink looks on the clay surface.
After attaching the keychain eyelet on each one, we put it on a cookie sheet, and popped it in the oven at the temperature level required (times and temperatures vary with each brand). There is a need to it cool down before doing anything else with it, because it is fragile while hot.
Miss Melody told us that polymer clay art projects can be painted with simple acrylic paint or glaze after the clay has cooled off. There is really so much to learn about polymer clay!

The Crafters Marketplace is holding Summer Art Workshops for those interested in honing a new skill or hobby. They have been doing business since November 2015 and some of their materials are directly sourced from US and Canada.
Do check them out soon to get you started in a handcrafting adventure this summer.
Comments
Post a Comment